“Crustless” Pie – Quick and Versatile

Another adapted recipe, inspired by a friend’s holiday celebration. This is incredibly easy and open to all sorts of variations. The texture is somewhere between a muffin or coffeecake (in the center) and a scone or cookie (at the edges); the choice of fruit makes a lot of difference in how moist it’ll be.

Here’s the original version (adapted from http://allrecipes.com/recipe/12398/crustless-cranberry-pie/)

  • 1 cup flour
  • 1 cup sugar1
  • 1/4 tsp. salt
  • 2 cups cranberries (fresh or frozen)
  • 1/2 cup chopped walnuts
  • 1/2 cup melted butter
  • 2 eggs, beaten
  • 1 tsp almond extract

Directions:

Preheat oven to 350°. Grease a 9” pie dish and set aside.

Mix dry ingredients together; add berries and nuts and toss to cover. In a separate bowl, whisk together the eggs, butter, and extract. Pour into the flour mixture and stir until completely combined. The batter will be quite thick, especially if using frozen fruit.

Spread in pie dish and bake for 40 minutes or until golden at the edges and a tester comes out clean at the center.

Variations

These are some different versions I’ve made and enjoyed:

  • To the original version, add 1/4 tsp. ground cloves and 1 tsp. orange peel to the dry ingredients
  • Substitute 1-1/2 cups blackberries for the 2 cups cranberries, and vanilla for the almond extract
  • Substitute 1-1/2 cups blueberries for the 2 cups cranberries, and 1/2 cup slivered almonds for the walnuts; add 1 tsp lemon peel with the dry ingredients
2

Left: Blackberry-Walnut; Right: Blueberry-Almond

As you can see, you have lots of options! I plan to try diced frozen peaches with raspberries and pecans, and possibly a pineapple-macadamia (with maybe coconut too) version. I haven’t tried it with GF flour but I’d think it would work reasonably well.

Historical Fiber Arts: Anglo-Saxon Overdress

A good friend of mine, Hilla, is an accomplished musician and composer. She does an 8th-Century Anglo-Saxon persona – a time of relative freedom for women, and interesting things happening in the realm of story, poetry, and song. We worked out a barter: she would compose a song for my repertoire, and I would make a new overdress for her. She delivered her part last spring; I, however, took a bit longer. But it’s finally done!

30606632554_e2c68726c3_o 
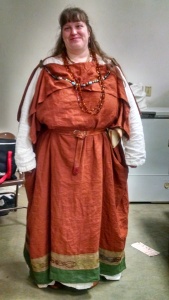
The Anglo-Saxon women’s costume from this period is a marvel of simplicity and practicality. Worn over a long basic tunic, it’s essentially two large rectangles sewn together at the sides from mid-rib-cage to just above the ankle. The top is folded over in front and back, and pinned at the fold on top of each shoulder. The peplum thus created can be pinned along the arms as well, or the back brought up and over the shoulders in a shawl fashion for extra warmth. A single such garment will fit a multitude of different body shapes and sizes; the length is adjusted by the amount folded over, as well as by blousing the midsection over the belt which snugs it in and carries her pouch, belt knife, etc. The lack of tailoring also reduces fabric waste, important when every thread was spun by hand and laboriously woven; with no cuts for shaping, the dress can later be taken apart and re-purposed if parts become worn or irremediably soiled. It can even be unpinned and used as a blanket at need!

Hilla’s persona is of at least the middle nobility, due to her educational level and skillset. This allowed me a bit more freedom in choice of color and decoration for her dress. People of higher societal class were more likely to wear more and brighter colors than those of lower class and wealth. Linen and wool fabrics were both typical of the time, so I chose linen as being more comfortable in warm weather and somewhat easier to care for than modern wools. The colors are acceptably close to those possible with dyestuffs of the time – the rust color coming from iron oxide, the green possible as an overdye of woad with yellow plant-based dyes, and the band of light tan coming from any of a number of sources. The dress is entirely hand-sewn.

The first step was the embroidered band. The design draws heavily on the interlaced zoomorphics seen in both Pictish and Norse carvings of the period; while Norse costume was not usually heavily embroidered, it’s reasonable to think that such designs on trade items might have made their way to English shores where such decoration was indeed known.

imag0369_18028096670_o

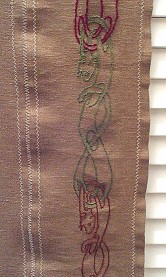
finished bands before separation

I used a French lambswool colored with natural dyes for the embroidery. In the photo to the right, you’ll see that I basted together both lengths of the band in order to keep the color pattern consistent; this also kept the band from being stretched out of shape on the slate-style embroidery frame that I used for it. (The slight rippling along the basting disappeared as soon as the bands were separated.) The pattern was traced onto clear Sulky wash-away stabilizer for ease of transfer. All of this section is done in stem stitch with a single, un-split thickness of the wool. All told, it’s approximately 104″ long by 3″ finished width.

11391695_10206108483464818_2580926179678243531_n

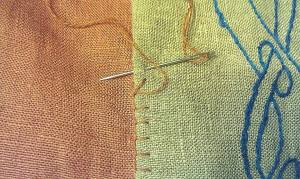
buttonhole stitching along the upper edge of the embroidered band

Once the bands were finished and the stabilizer removed (including a pass through the wash – gentle cycle, in a mesh bag, and hung to dry – to remove any last remnants), I attached it to the main body of the dress.  I then added the stripe of green linen, which is actually wide enough to cover the entire back side of the embroidery to protect it. After sewing the bottom edge of the embroidered band down to the green band, I used more wool in a buttonhole stitch both as an embellishment and to keep the seams flat.

I then sewed the side seams. I planned to finish all raw edges to prevent fraying; since the top is folded over, both sides of the seam would be visible and thus needed to be cleanly finished. This meant turning them under and catch-stitching them as invisibly as possible. 31283150162_7e08746c39_o
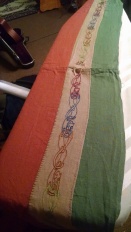
Basting the sides together all the way from top to bottom allowed me to press in a neat, even seam allowance that became the hems for the areas left open. (It also made it much easier to align the color bands correctly.) I had considered embroidering along the seams as well, but decided instead to leave them as inconspicuous as possible. 31428081255_e3aeb7db48_o

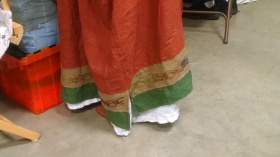
The completed dress then received a final washing – again, gentle cycle – and was hung to dry. Linen handled this way needs little or no ironing and will last quite a long time.

Hilla and I are both very happy with the final product!

Sunny Citrus Shortbread Bars

IMG_4026
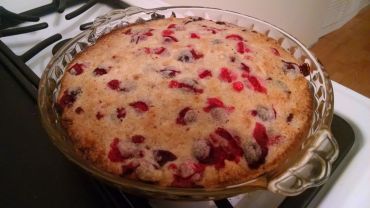
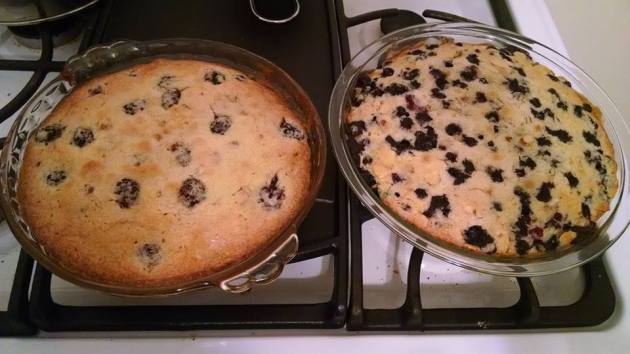
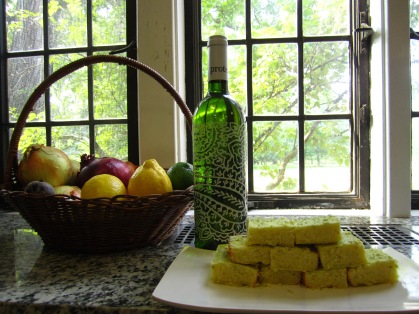
Last August, I was invited to contribute a dessert recipe to Protea Wine’s blog. It was an adaptation of something that had been floating around the Internet for a few weeks, that I’d brought into the office one day to rave reviews. I’d fully intended on posting it here, but then lost track of it…until I just recently stumbled across the image files again.
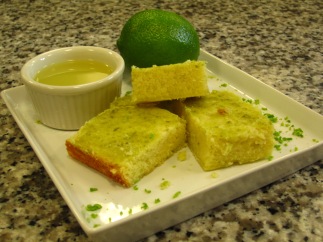
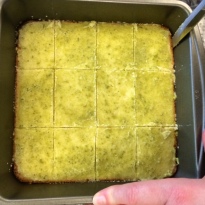
The original recipe called these “lemon brownies;” to my taste, the texture is nowhere near a brownie – much more of a moist shortbread. They’re not overpoweringly sweet and the fruit flavor really shines through. It’s another recipe that works quite well with gluten-free baking mixes – in fact, I like the slightly nutty flavor they give. I’ve used oranges, lemons, and limes in these bars, and while I’ve liked them all, the lime version was the hands-down favorite among my co-workers.
photo 8Bars:
3/4 cup all-purpose flour or gluten-free flour
3/4 cup granulated sugar
1/4 Tsp salt
1/2 cup (1 stick) unsalted butter, softened – or use salted butter and omit additional salt
2 large eggs
2 Tbsp fresh citrus zest
2 Tbsp citrus juice

Glaze:
2 Tbsp citrus juice
4 Tbsp fresh citrus zest
1/2 cup confectioners’ sugar

Directions:
Preheat oven to 350°. Grease an 8×8 inch baking dish with butter and set aside.
Zest and juice two large lemons or oranges (may require 3-4 limes depending on size) and set aside. You’ll have extra juice left over, and in fact the amount of glaze made is more than generous – try using the extra for dipping fruit or ladyfingers!

Cut dry ingredients into butter until thoroughly combined. In a separate bowl, whisk together the eggs, 2 Tbsp zest, and 2 Tbsp juice. Pour into the flour mixture and beat until smooth and creamy.6. baked and cooling

Spread in baking dish and bake for 23-25 minutes or until golden around the edges. Do not overbake, or the bars will dry. Allow to cool completely before glazing.

Sift the powdered sugar and whisk with remaining zest and juice. Spread over the bars and let set before cutting. The bars will be delicate – you can cut them while still warm, but make sure they’re completely cool to the center of the pan before attempting to remove them.

Makes a dozen generously-sized bars.

IMG_4021

A big hat-tip to Protea Wines for the use of some of the images; see the original post at  http://www.proteawinesusa.com/2014/08/wine-and-dessert-pairing/

Adapted from http://www.bestyummyrecipes.com/lemony-lemon-brownies/

Good fences make…well, happier neighbors

IMAG0389

old fence

The fences behind my house are at least 15 years old. They may have originally been constructed of pressure-treated cedar, but lack of any other finish means that time, weather, and critters (especially cats and squirrels) have taken their toll. The privacy fence needs new posts and so is too daunting a task for me, but the divider between the yard and driveway was another story. Its posts are in quite good shape, but the pickets were ready to splinter and crumble at the touch. So with two days of sun and spring warmth in the forecast, and no other plans in place, my daughter and I tackled our first adventure in building a fence.

The old fence pickets used a “gothic” profile for the top – a rather intricate cut with a pointed tip and a keyhole effect between. Not only were new pickets in a “dog-ear” profile cheaper, I think they’ll prove sturdier in the long run. The most convenient size were five-foot 1″ x 6″ in untreated cedar, plus three pairs of 8′ cedar 2″ x 4″s (also untreated) were conveniently sized for the rails – needing only minimal trimming. Since the gate rarely – if ever- was closed, I decided not to mess with replacing it.

We started by cutting the pickets down to 45″ length and marking the lines where the rails would cross. All of the lumber then received a coat of Pittsburgh Paints “Ultra” semi-transparent stain/sealer in “Forest Floor” on one side. While they were drying, we took the old fence down; I used a IMAG0391
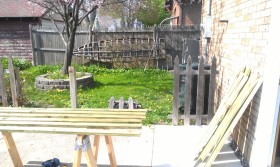
reciprocating saw to slice through the rails in 3-foot sections (the max size for our city bulk-waste site to accept) before pulling them off the posts. I have to say that whoever built that fence intended it to stay where it was…there were some pretty major nails securing it to the posts! We also stained the posts while they were exposed.

As soon as the stain was dry enough to touch, we started assembling the new fence sections. The pickets were laid out on my worktable with the off-cuts as spacers, then we laid the rails across and secured them with two screws per picket. The resulting panels were light and easy to maneuver into place with the previously-stained side facing the posts. As the panels went up, we stained the remaining surfaces.

IMAG0393

first completed panel

To cover the ends of the rails and give a finished look where the gate used to be, I attached one additional picket to the post on each side of the opening. This also gave me an angle in which to conceal a simple bracket for a solar lantern to flank the opening. The bracket is simply a piece of picket off-cut with a hole in the center for the lantern’s post, fitted into the corner formed by the tops of the two pickets and screwed into place. Since inexpensive solar lanterns usually only last a year or two, this mounting makes them easy to replace.

This would have been a one-day job had I not mis-counted the number of pickets needed. As it is, we worked at a “vacation” pace (i.e., late start, long lunch, and early knock-off) and still got it done in under a day and a half. Which was fortunate, because it meant that the staining was finished (and the grass cut) before the rain moved in… It could use another coat of stain to cover some drips and uneven spots, but on the whole I think it looks great.

Approximate cost: $155

  • 41 Cedar 1″ x 6″ pickets $61.50
  • 6 2″ x 4″ x 8′ rails @ $32.40
  • stain, hardware, and lanterns +/- $50
  • a day of playing with tools and wood with my daughter: PRICELESS!
IMAG0397

new fence

IMG_4800

with lanterns lit


Garlic Mushrooms

This past week’s project came about due to a good barter deal. In exchange for some small pieces of armor for our SCA loaner gear, I agreed to can $20 worth of garlic mushrooms (or about 7 pounds at current warehouse-club prices).

The mushroom recipe is loosely based on a crowd favorite at the local Renaissance Faire, where it’s served with a breadstick, a toothpick, and lots of napkins.

  • 1 pound fresh mushrooms, in bite-size pieces
  • 2 cups broth*
  • 2-3 cloves garlic (adjust as desired)
  • 3 TBSP butter**
  • 1 small bay leaf
  • 1 tsp finely chopped fresh thyme, or ½ tsp dry
  • Salt and pepper to taste

Simmer together over low heat, adding water if needed to just cover mushrooms, until cooked through. Chopped onion makes a tasty addition if desired. Makes 4-6 side-dish servings.

*Broth: Beef, chicken, or vegetable broth all work equally well. If using commercial canned stock, I tend to dilute it 50/50 with water.

**Butter: You can cut down the amount of butter used if desired, but I wouldn’t eliminate it entirely since it’s key to developing the depth of flavor. I’ve tried making it with olive oil (my other preferred fat) but it just isn’t the same.

Leftovers (if you have any – a rarity for me!) are quite versatile. Add your favorite thickener, and you have a rich brown gravy; or add sour cream and diced cooked meat or shredded cheese, and toss it with pasta for a quick and hearty meal. Or strain, skim, and use as soup stock. (This weekend’s leftover broth became lentil-wild rice soup.)

The flavors improve with re-heating, which make it an ideal recipe for home canning as well. Use pint jars and process in a pressure canner for 45 minutes at 10 pounds pressure. Figure roughly one pound of fresh white button mushrooms per pint. (In the photo, the light-colored band at the top of the jars is the butter that rises to the top and solidifies.)

Image

Quilt Re-Creation (Part 2)

The quilting pattern on this project was fairly simple. I opted to use the same pattern as the original quilter had done, following the key piecing lines in the blocks and along the sashes. (Not quite “in the ditch,” but 1/8” to 1/4″ from the seam.) It’s plainer than my personal preference – I like to fill at least the sashes with some kind of detail – but retaining the flavor of the original design was more important this time.

Normally I use all-cotton hand-quilting thread. However, due to the fragility of the fabrics, in this case I opted for a finer-weight poly-cotton thread that would put less stress on the fibers as it passed through. The downside to that choice is that the looser fibers of the thread made threading my fine needles (#12 “betweens” – a very slim and short needle) much more difficult; when you thread 50 needles at a sitting, it makes a huge difference!IMG_3650

Why do I use so many needles? One reason is that, when I get a good rhythm going, I want to be able to just pick up the next needle and keep moving. There’s a visible difference in the stitching line each time I take a break, so quilting continuously means more consistent results.

IMG_3649

Another reason is that, while I may start with 50 needles, I won’t end with that many. I expect to lose at least 10 to 20 of them over the course of the project, to breakage and extreme deformation: I can keep going with slight bends in the needles, but a 45-degree angle is a bit much… This happens when the heat of my fingers has softened the needle slightly, and then it hits a seam or thicker section of seam allowances. A thicker needle doesn’t have quite as much of a problem with this, but I find that the small needles are well worth it for the fineness of stitching I can achieve with them. Anything larger than a #10 “sharps” feels like a crowbar to me now!

The quilting itself took around 2 hours per block (including the sashes), somewhat longer than I’d originally estimated. And because I’d mis-estimated, I got it into the frame about a week later than I should have – so delivery for Christmas meant some marathon sessions at the frame. I worked from the center block out to the edges, burying the working thread edges, IMG_3648removing pins, and using tweezers to pick up the old loose threads as I went. A few of the blocks also needed minor repairs, which were easy to do at the same time.

Nearly all of the quilting was completed in the space of 4 days. (Something I never want to do again. That’s not enough time for protective calluses to form properly, so my fingertips were still quite sore – despite using a thimble – for several days afterward.) Once that was finished, things went pretty quickly. I cut off the excess backing flush with the edges of the top and batting, machine-stitched white 1” doublefold bias tape (optic white, unfortunately, but color choices are rather limited unless I want to make my own) on the top, and trimmed all the edges. The tape was folded over and hand slipstitched into place on the back with “eased” corners rather than mitered (faster, easier, and wastes less bias tape).

The quilt finished at approximately 50” wide by 64” long, generous for a crib quilt but comfortable for a couch or bed throw later on. I delivered it to Susan on December 21 as I headed out of town for the holidays. The unused blocks from the original quilt will be mounted on scrapbook pages in an album for her to keep (and for use as repair fabric in the future, since the vintage fabrics are still rather fragile in places and are likely to continue deteriorating with use). She’s thrilled to be able to return her keepsake to use for a new generation, and I had a fun project and the satisfaction of saving another quilt from oblivion.

IMG_3652

IMG_3655

(For what it’s worth, I’d guess I probably made no more than minimum wage for the hours spent; I’m not complaining, but I definitely do need to learn how to estimate labor hours more accurately! Chalk it up this time to a “friends and coworkers” discount.)

Materials used (aside from the original quilt):

  • 2 yds 45″ cotton broadcloth
  • 2 yds 90″ cotton muslin
  • “twin-size” unbleached cotton batting
  • 8 yds 1″ double-fold bias tape
  • 100-150 yds poly-wrapped cotton sewing thread

Quilt Re-Creation (Part 1)

My co-workers all know that I do a lot of needlecrafts. This past summer, Susan mentioned that the quilt her mother had made (for Susan’s wedding, if I remember correctly) was in need of repair, and asked me to take a look at it.

Image

I did a complete inspection and found quite a bit of time-damaged fabric, loose seams, and age staining. Here are close-ups of a few of the blocks:

ImageImageImageImage

I gave Susan two estimates: one for “conservation,” which would slow down its deterioration and make it usable for décor only; and one for “restoration,” which would allow it to be returned to use as bedding. The estimates included an assessment of each individual block’s condition as well as that of the overall quilt. In both cases, my primary idea was to retain as much of the original fabric and stitching in the blocks as possible. The conservation would include repairing seams, stabilizing damaged fabrics, and adding an edging, while the restoration meant replacing the sashing, batting, and backing fabric. Both estimates also included a soak in a textile-conservation product (“Retro-Wash”) to remove age staining – while the quilt had been carefully cleaned, it had been stored in one of those zippered plastic bags that bedding is often sold in, which had accelerated the browning common to stored older fabrics.

Susan came back with an even better idea. Twelve of the blocks were noted as “good” condition, meaning little or no staining observed or repair needed. She suggested setting just those twelve blocks into new sashing to create a crib quilt for her new granddaughter, for the same price as I’d quoted for the total restoration project. We settled on delivery “for the holidays” and she gave me a 40% deposit for materials.

The first step was to remove all the old materials. I cut through the sashing to separate the blocks (to avoid damaging any of the seam allowances) and then peeled the layers apart and removed the remaining sash fabric, snipping the quilting threads rather than pulling them and putting stress on the block pieces. (I salvaged some of the soft old percale backing as I went, for use as cleaning and wood-polishing cloths.) At this point I didn’t worry about removing the snipped threads; I’d be seeing every block I used “up close and personal” during the quilting process and would remove them then. Completely removing the sashing also eliminated the need for the textile soak, since there was little evidence of discoloration on the blocks themselves.

For the new sashing, I chose 100% cotton broadcloth in a slightly warmed white, figuring that an optic or blued white would clash with the age-softened colors of the blocks. The backing fabric is 100% cotton muslin. Both were pre-washed in hot water with no softener to remove any sizing treatments and control shrinkage. After ironing, I spread out the backing and laid out the blocks we’d chosen to re-use, measured the lengths and widths of sashing needed, and started cutting and assembling.

Image

The blocks had originally been set with 1/4″ seam allowances. However, many of the fabrics were (not surprisingly) weakest right at that stitching line; I decided to “lose” a little of the blocks in visual terms and gain in strength by increasing the allowance to 3/8”. Once assembly was complete, I laid out the new top and batting on the backing fabric and, starting from the middle, pinned all the layers together every 8”-10” with the pins all oriented along the long axis of the quilt. About 6” of extra backing fabric extended to each side for attaching it to the poles of the quilt frame.

Part 2 will follow the project from frame to finish.

A new endeavor

Welcome to MacGregor’s Mill!

Let’s start with introductions.

  • MacGregor’s Mill creates hand-crafted accessories for the historical re-creation community (such as SCA members). You can find MacGregor’s Mill products at Celtic Sun. (And that’s the only time we intend to advertise MGM on this blog.)
  • Marie is in charge of all things with a historical bent; she’ll be producing and commenting on much of the content.
  • Nita has a more modern focus (and also pays the bills and keeps the lights on).

So, why another blog? Well, Marie is often asked for recipes, photos, and so forth, but finds them too long and awkward to post to Facebook and too impersonal (or has too many requests) to individually e-mail. MacGregor’s Mill: The Blog will provide a single place to post resources, show step-by-step how-to’s, and generally celebrate Making and Doing.

(Please note: feel free to link to this blog with proper attribution; if you’d like to re-use something posted here, please ask for permission. Chances are good that you’ll get it gladly, but the courtesy of asking would be appreciated.)

There’s no guarantee on how often MGM:TB will be updated; there won’t be filler posts when there’s nothing interesting to say or show. Nonetheless we hope you’ll check back now and then, leave a comment when you’re so moved, and learn and enjoy.

Cheers!

Gluten-Free French Tart

gluten-free french pear tarts

I’ve had a lot of success with this recipe; in fact, I find I prefer the gluten-free version of the pastry cream to the original flour-based recipe. The original used apples instead of pears, and no rosewater – so you can see that it’s pretty versatile!

Gluten-Free Pear Tart (adapted from Bistro: The Best of Casual French Cooking by Gerald Hirigoyen)

Tart pastry (see below)

1 cup pastry cream (see below)

3 large pears such as Anjou

2 Tbsp rosewater – optional

2 Tbsp melted butter

1 Tbsp sugar

  • Preheat oven to 375°.
  • Line a 10-inch tart pan with the pastry dough; trim and return to refrigerator. Peel and core the pears and slice thinly into a shallow dish; sprinkle with rosewater and set aside.
  • Spread pastry cream to 1/8” thickness in the tart pan. Thoroughly drain pear slices and layer evenly over the cream until it’s completely covered. Brush with melted butter and sprinkle with sugar. Bake until golden brown and lightly caramelized, about 50 minutes.

Tart Pastry

2 cups baking mix – I use King Arthur gluten-free flour substitute

6 Tbsp butter

1 c confectioners’ sugar

1 egg

¼ tsp salt*

  • Cream butter and sugar; add egg and salt. Cut in flour. Form into ball, wrap and chill 2-3 hours. The dough will be quite sticky at first but will dry rapidly. If not avoiding gluten, substitute an equal amount of all-purpose flour for the baking mix.

Gluten-Free Pastry Cream

2 cups whole milk

3 tablespoons cornstarch

1/4 teaspoon kosher or fine sea salt*

2 tablespoons cold, unsalted butter

6 large egg yolks, at room temperature

1 tablespoon pure vanilla extract

1/2 cup sugar

  • In a large saucepan, bring the milk and salt to a boil, take off the heat, and set aside.
  • Beat the egg yolks and sugar at medium-high speed until the mixture is thick and light yellow, about 3 minutes. Turn the speed to low, and beat in the cornstarch. Then slowly pour the hot milk into the egg mixture and beat until well mixed. Pour the mixture back into the saucepan.
  • Cook the mixture over medium heat, stirring constantly with a whisk or wooden spoon until the mixture becomes thick and starts to gently boil. Continue to cook for 1 to 2 minutes more. Remove from heat and stir in the cold butter and vanilla. If the mixture appears curdled, keep whisking and it will come together again. Strain the mixture through a fine sieve into a bowl. Cover with a piece of plastic wrap, pressed directly on top of the pastry cream to prevent a skin from forming. Refrigerate until cold, about 2 hours. Makes enough for two tarts.
  • The pastry cream can be made 2 to 3 days ahead and stored in the refrigerator. Whisk the pastry cream until smooth before using.

*I use salted butter in both recipes, and omit the added salt.